Background

Wednesday, November 2, 2011

Bacon, Mushroom and Pea Risotto


Recently I discovered a new favorite ingredient….are you ready? I’ll give you a clue:
Photo via IMDB

Yup in addition to free healthcare and mounted police, Canada also has the most delicious bacon….really, what’s not to love about our neighbors to the north?

Wednesday, October 19, 2011

How to Save For Retirement by Eating a Healthier Dinner


CrownFriedChicken
Source: Crown Fried Chicken

It’s a story we’ve heard over and over– Americans are obese because many can’t afford to eat a healthy diet.  Really?! Is that even possible? I’m no genius, but the math in that equation never seemed right. 
To me, it seems more likely that most people are just too L-A-Z-Y to bother with meal planning and cooking. So, I was excited when I came across this article in the NY Times that supported my assumption.


Sunday, September 11, 2011

A Decade of Perspective - Part III


Given my initial reaction, you can imagine my surprise when I was reduced to a blubbering, weeping mess while watching the History Channel last year on the nine year anniversary of 9/11. What triggered the emotion that I didn’t have all those years ago? For me, it was watching the footage of dust covered people running past the landmarks I recognized from my everyday routine. There’s the shoe repair store and the eyeglass place, and here are the people taking refuge in a lobby that I walk by every day. Then there are the emergency responders talking about survivors and casualties in the foyer of 7WTC. Obviously the building is all new now, but I immediately recognized the way that the light filters in past the other buildings and the unchanged position of the security desk.
Suddenly NYC’s WTC was no longer a far-off or remote place. There I am sweeping past the security desk and taking the elevator to my 8 AM meeting.  Here are my friends running dazed and dust covered through the streets of NY. There’s the man I love going into the lobby to rescue survivors.

Saturday, September 10, 2011

A Decade of Perspective - Part II


Now, ten years later my life is completely intertwined with the city of NY. I know the subway system by heart; I can interpret the unintelligible route change announcements. I’ve made friends, lost friends, had 6 apartments and 5 jobs. I've learned that I’m supposed to say something if I see something.  I’ve seen police officers with semi-automatic weapons and I know my NYPD fiancĂ© has a biohazard suit in the trunk of the car.
During my NYC career, I've also worked at the rebuilt World Trade Center 7. Working at 7 WTC wasn't quite as awe-inspiring as you might think.  In fact, most days were pretty unremarkable and I was more likely to be annoyed by the tourists that blocked the sidewalk to take pictures than awed by the rebuilding efforts. Each time I start a new job though, I know I'll probably be issued a bright red fannypack filled with emergency PowerBars, water, burn cream and a gas mask in case of an attack. It’s not something I ever think about; to me it’s just a normal part of life.

Friday, September 9, 2011

A Decade of Perspective - Part I

In a very special memorial version of NYCitified, I’m posting a three part series with my thoughts and reflections on the last ten years. The events of 9/11 have deeply impacted my generation and had a huge impact on the development of our adult lives.  This is the story of how my life has been influenced.

Photo via All Posters


September 11, 2001 – it was a crisp, fall morning in Pittsburgh and I was on my way to class during my senior year of college. I was wearing a white sweater and I’m sure I was thinking about the heavy subject of whether or not I had time to stop and get a granola bar. Suddenly multiple cellphones were ringing simultaneously and it was as if everyone on the street got the memo to stop walking at exactly the same moment. Flight 93 had just gone down in Shanksville, PA but the news media had it slightly wrong, and reported that a plane had just crashed in Pittsburgh. The University of Pittsburgh parents were in a panic and the day that had started out so peacefully, had just taken an abrupt turn for the surreal. The US was under terrorist attack and the North Tower of the World Trade Center was about to collapse.

Tuesday, August 30, 2011

Easy Strawberry Avocado Salad

I’ve been a bad blogger. Bad, bad KT for neglecting the readers (all 2 of you) and leaving the blog to rot like an old banana. Don’t worry though; I’m currently doing penance in time out…..
I wish I had some good excuse for completely ignoring my blog, but the truth is that it’s just been way too humid for me to even think about getting creative in the kitchen. My kitchen adventures lately have been strictly in and out affairs with tried and true recipes.  Nothing really exciting to report, but with autumn right around the corner I’m back on the wagon!
The upside of all this neglect is that it’s allowed me to get some serious wedding planning done. Ladies and gentlemen we have a dress! I’m so excited, but Mr. Officer is a little bummed that I won’t let him see a picture. Apparently no one told him that seeing the bride before the wedding is bad luck. However, I’m willing to make a one-time exception just to stop the bellyaching, so without further ado……a dress pic:

Thursday, July 21, 2011

Basil – Arugula Pesto Pasta


Random story - one of the first times I had pesto was during a business lunch when I was working at American Ballet Theatre. We were meeting a high society donor for lunch at Union Square CafĂ© and I was absolutely terrified that I was going say something stupid or get a giant piece of spinach stuck in my teeth. Unknowingly I ordered the pesto, which is basically a spinach tooth just waiting to happen. Luckily I managed to get through the lunch without completely embarrassing myself, but lesson learned for all future dates and/or business lunches with intimidating high society ladies!

Monday, July 18, 2011

Weeknight Spaghetti & Meatballs

Confession time.....for most of my life I was afraid to make spaghetti & meatballs. It's true, this is the type of shame I carry with me on a daily basis.

I think maybe I've been traumatized by all the stories I've heard about Italian Grandmothers lovingly toiling over huge pots of red gravy for hours; stirring, tasting, seasoning, etc. The truth is, if I made Italian wine in my basement or grew tomatoes for my sauce in my garden in Queens, I think I might feel the same way because sometimes it's about the process and the memories. Who can compete with that level of dedication?


However, I managed to overcome my fears and made some very delicious meatballs the other day. Sometimes it's the small victories in life. Not to brag or anything, but the sauce was so delicious that I may have been taking little spoonfuls everytime I passed through the kitchen for the rest of the night.....please don't judge me (even if I used my fingers a few times).


End result: I had a delicious dinner, my man had a delicious dinner, everyone wins, I'm so proud of myself! Huh, maybe the Grandmothers won't rise up and chase after me with wooden spoons after all!

*Bonus wine pairing recommendation: I enjoyed my spaghetti & meatballs with a nice glass of Chaddsford Winery Merican. We're kind of obsessed with the Chaddsford Winery and my man never misses an opportunity to show off his vintners club frequent buyer card.....because we're giant nerds and love that kind of thing. Not to worry though, there will be lots more babbling on about wine as get closer to our wedding in a Pennsylvania winery/bed & breakfast next year!

Spaghetti and Meatballs
Meatballs
1 lb ground meat
1 egg
¼ c. breadcrumbs
1 tsp. dried parsley
1 tsp. dried oregano
½ tsp. nutmeg
1 tbsp olive oil

Sauce
1 shallot, chopped
¼ c. red wine
28 oz. crushed tomatoes with basil
 15 oz.  diced tomatoes
2 tbsp. tomato paste
1 tbsp dried oregano
1 tsp. dried parsley
1 tsp crushed red pepper
2 tsp. sugar
1.       Combine all meatball ingredients except for the olive oil in a large mixing bowl. Form the meat mixture into balls using your hands (it should make about 12 meatballs). Be careful that you don’t handle the meat too much because that will result in tough meatballs.
2.       Heat the olive oil in a dutch oven on the stovetop and brown the meatballs in the oil. Remove the meatballs to paper towel lined plate to drain.
3.       Reserve 1 tbsp of the oil and meat drippings in the dutch oven, add the shallots and cook until softened (about 5 minutes). Turn off the heat, add the wine to deglaze the pan and cook off the alcohol.
4.       Add the remaining ingredients to the pan along with the meatballs and simmer for approximately 30 minutes or until ready to serve.

Wednesday, July 6, 2011

BBQ Ribs

I hope you all had a fun and celebratory 4th of July, I know we all had a great time here in NYC!

I was so excited to finally spend a holiday with my main man this year. Alas, the city of NY had different plans and he ended up patrolling the harbor during the fireworks (cue Price Is Right style loser sound effect).

But as a consolation prize, doesn't he look so handsome and official in the picture below?! Rawr....not even gonna lie, I did consider leaping into the harbor so that I could be rescued by this good looking guy:


However I'm happy to report that I was able to hold onto some small shred of dignity and did not end up swimming out to his boat. Instead, I settled down to watch the exact same fireworks with our friends from a sweet vantage point behind the Intrepid Sea, Air and Space Museum. Oooohhh, aaaahhh, pretty and patriotic!


Yup, Macy's really knows how to put on a show. Plus we discovered that the added bonus of a fireworks display sponsored by a huge department store is that it provides a perfect setup for numerous jokes about the finale involving a special, aerial coupon code for 25% off slacks. These are the jokes folks.

Now that I'm done gloating about my handsome fiance and excellent fireworks-watching spot.....let's cook some ribs! I don't really have too much to say about this recipe except that it's good, you should make it. And yes, that's a blueberry muffin on the plate. Don't knock it until you try it!


BBQ Ribs
Barbecue Bible BBQ rub (recipe below)
Rack of ribs
BBQ sauce

1.       Pre-heat oven to 300 degrees. Rub ribs all over with dry rub, seal tightly in aluminum foil and place in a baking dish.
2.       Bake for 2 hours at 300 degrees.
3.       Open aluminum foil and baste with BBQ sauce, put back in the oven and cook for an additional 30 minutes.

¼ c. sweet paprika
1 tbsp dark brown sugar
1 tbsp granulated sugar
2 tsp salt
1 tsp celery salt
1 tsp ground black pepper
1 tsp dry mustard
1 tsp garlic powder
1 tsp onion powder

1.       Combine all the ingredients in a mason jar, shake to mix and use as needed. Makes about ½ cup or enough for 4-6 racks of ribs. The rub can be stored away from heat and light for up to 6 months.

Thursday, June 30, 2011

Chicken Tacos

Greetings blog readers! I feel like I’ve been a little behind on my blogging lately, but I’m back today with a great recipe for chicken tacos.


I love this recipe because it incorporates three of my favorite things: a crockpot, laziness and Pepper Jack cheese. Plus the tacos are relatively low-fat and taste great with a Corona. My main squeeze told me that these tacos were better than the version served at our local Mexican restaurant so I will take that as a big old compliment. Now if I can just learn how to make pizza we’ll really be in business! So, anyone have any good pizza recipes?

Chicken Tacos


16 oz container salsa
6 boneless, skinless chicken thighs
15 oz can black beans
1 package of 6" corn tortillas
Sliced Pepper Jack cheese
Tomatoes, chopped
Avocado, chopped
  1. Place chicken, salsa and black beans in crockpot. Cook on low for about 8 hours or on high for about 5 hours (adjusting temperature as needed for frozen chicken).
  2. Using a gas stovetop, char the tortillas slightly by placing each one individually on a burner for a few seconds until it's slightly blackened around the edges. Please use caution when doing this and watch your tortillas closely to make sure they don't go up in flames!
  3. Make the tacos by layering the tortillas with the cheese on the bottom, followed by the chicken mixture with the tomatoes and avocado on top.

Monday, June 20, 2011

Emeril’s Fish Provencal – My Favorite Summer Dish

A few years ago I was browsing through Martha Stewart’s Everyday Food Magazine and found this recipe for Emeril’s Fish Provencal.
Photo via Martha Stewart
Note: mine never looks this pretty, it's okay though, it still tastes delicious!

The recipe doesn’t look like anything special, but I have to tell you the taste is absolutely amazing and the recipe quickly became a favorite.  It’s so perfect for a summer day, and the big bonus is that it’s also super healthy – high in heart healthy omega-3 fatty acid, lycopene filled tomatoes and cancer fighting dietary fiber in the zucchini. 
Now that I’ve made this about a zillion times, I’ve made a few changes to the original recipe:
1.      When I don't feel like dealing with the grill, I cook mine under the broiler for 20 minutes instead.
2.       Instead of haddock or cod, I used bluefish this time……….but only because it was on sale at the store.
3.       I love Penzy’s Northwoods seasoning so I always use it instead of the Italian seasoning and anise seeds. Plus that saves me from having to buy a random ingredient like anise seeds.
4.       If I have an open bottle of wine in the fridge, I usually add a little splash of wine to the packet.
5.     I used thinly sliced shallots instead of Vidalia onion.

Totally delicious with a glass of white wine, out on the patio!

How about you? Do you have a go-to summer favorite

Monday, June 13, 2011

Slow Cooked Pot Roast with Whiskey Gravy

We just returned from the absolute best vacation ever in Disney World. Everyone say yay for Disney World! Who knew that Disney was so much fun for adults? We were like two big kids running around to all the rides, picking out which things we wanted to do next…..plus now we have the added bonus of being old enough to fully experience the Epcot World Showcase (a.k.a. the international beers and snacks of the world).  Huge score.
Photographic evidence of us finishing our vacation with French champagne & crepes
Now we’re back to reality, sigh. I think we’re both feeling a little bummed to be back to the real world so I decided we needed a little comfort food pick-me-up to start the week.  That and I had a pot roast in the freezer that was starting to feel a little neglected. Hence, slow cooked pot roast with whiskey gravy! Which, by the way, to add to the huge list of reasons why I love my slow cooker…..did I mention that we don’t have air conditioning here and that the thought of using the oven in 90 degree weather is not so appealing? I’m just saying, expect lots of slow cooked love this summer.

Slow Cooked Pot Roast with Whiskey Gravy

1 1/2 pound beef roast
10.25 oz can beef gravy
10.25 oz warm water
A few handfuls of baby carrots
1 onion, cut up
3 small russet potatoes, cut up
2 tsp flour
1/4 cup whiskey
salt & pepper to taste

1. Place beef roast in slow cooker and surround with vegetables. Pour the can of gravy over top, and add one can full of warm water to the slow cooker. Cook on low for 10 to 12 hours.
 
2. At the end of the cooking time, remove roast and veggies from the slow cooker and strain the juices into a saucepan on the stove.

 
3. Mix together the flour and whiskey (I usually shake mine in a mason jar to get out all of the lumps) and whisk the flour mixture into the juices in the saucepan to create a gravy. Add salt & pepper to taste and bring to a rolling boil, stirring or whisking frequently.
 
4. In the meantime, slice the beef and add it back to the slow cooker along with the cooked vegetables. When the gravy is done, pour it back into the slow cooker and put the cooker on warm until ready to eat.

*Note: I used a roast straight from my freezer, you may need to reduce the cooking time if you are using a piece of meat that is not frozen.
Yum - looks good enough to eat!

Monday, May 30, 2011

Memorial Day Cheeseburgers!

It’s officially summer in NYC, time for backyard BBQs, walks in the park and sweating it out in the subway stations.  

It also means that the fleet is in for Fleet Week….well hello sailor!

Photo via NY Daily News


Photo via Gothamist

In honor of Memorial Day this year, I salute our devoted servicemen and women with the most American thing I can think of.....a cheeseburger!  NYC loves you and thanks you for your devoted service. So up kick your feet, grab a beer and enjoy the guilty pleasure of a greasy burger because, baby, you've earned it.


1 lb ground beef
1 tbsp BBQ rub seasoning
1 tbsp Worchestershire Sauce
1 tsp dried parsley
1 avocado, sliced
1 beefsteak tomato, sliced
4 slices pepperjack cheese
4 hamburger buns
cooking spray

Directions
  1. Mix together ground beef, BBQ rub, Worchestershire sauce and parsley. Form into 4 flat patties (about 1/4 inch each). Note: try not to overwork the meat because that will result in tough burgers.
  2. Heat a frying pan coated with cooking spray over high heat. Add burgers and cook for 3 minutes.
  3. Flip burgers and add cheese. Cover and cook for an additional 3 minutes.
  4. Assemble burgers on buns with avocado and tomato slices. Enjoy!

Memorial Day Cheeseburgers

Tuesday, May 24, 2011

Broccoli, Pea and Prosciutto Pasta Bake - recipe help needed!

I have a confession to make….I made a terrible dinner the other night.  It didn’t taste like feet or anything, it was just kind of lame.
I was in the mood for a baked pasta dish but we’ve been trying to eat healthy. I figured it would be easy to whip up something good and low-fat. Wrong. Somehow in my zeal for low-fat deliciousness, I made a very boring dish. What can I say; sometimes the man of the house gets stuck with a big, steaming bowl of bland for dinner. Big bummer though, I was really hoping this one would work out because I wanted to love it.

Photo via tvtropes.org
Now, dear readers, I need your help because I still want this one to work. Take a look and let me know if you have any ideas on where this might have gone so wrong! The person that can tell me how to renovate it into something healthy, lowfat and satisfying gets a big, gold star.
Broccoli, Pea and Prosciutto Pasta Bake

1 10 oz bag frozen broccoli
¼ c frozen peas
8 oz large pasta shells
3 pieces prosciutto, chopped
1 15 oz container non-fat ricotta cheese
2 egg whites
½ c low-fat Italian cheese mix
½ c low-fat milk
¼ c grated parmesan cheese
1 tsp dried oregano
1 tsp dried basil
½ tsp dried parsley

1. Pre-heat oven to 350 degrees. Start a pot of water to boil and cook the pasta per the package directions.

2. Microwave the broccoli on high for 3 minutes, add the peas and microwave an additional 30 seconds.

3. In a large bowl, mix together the remaining ingredients. Add the broccoli, peas and cooked pasta.

4. Pour the entire mixture into a 2 quart square baking dish and bake covered for 45 minutes.

Thursday, May 19, 2011

Oven Fried Chicken

Recently I’ve been trying to reduce our weekly grocery bill while finding ways to continue making tasty and healthy meals. My goal is to get our bill down to $60/week, but let me tell you folks it’s not so easy in NYC. Especially since I love, love, love shopping at the fancy grocery store. For some ridiculous reason it’s just relaxing to me… there are free samples of fancy cheese and the milk comes in pretty glass bottles. Speaking of which, big PSA for any readers in the NY metro area; I just found out that you can get $1.50 back for returning your Ronnybrook glass bottles to the grocery store. So there you have it, I’ve officially found an excuse to keep on buying fancy milk and sampling expensive cheese. What?! I get money back, it’s cost cutting!


Photo via: Ronnybrook Dairy
But back to the issue at hand, last week I swapped my usual boneless skinless chicken breasts for more budget friendly skin-on chicken legs. Originally I was going to make regular baked chicken, but I was feeling kind of meh about that as a dinner option so I decided to go for some oven fried chicken instead.
I’m not sure that this really classifies as “healthy” per se, but considering that it isn’t fried in three inches of oil, I’m okay with dubbing it a healthy alternative. However, I will caution you that if you are craving traditional fried chicken with a thick crust, this probably won’t do it for you but it is delicious and makes the house smell A-MA-ZING! Also it goes great with a little bourbon spiked iced tea…..go on with your bad self, I won’t tell J

Oven Fried Chicken
2 cups buttermilk
2 tsp  hot sauce
3 tbsp shortening
1 1/2 pounds chicken drumsticks
2/3 cup Bisquick
1 1/2 tsp poultry seasoning
1 1/2 tsp cayenne pepper
cooking spray
1. Place chicken, buttermilk and hot sauce in a large bowl and marinate in the fridge for at least 2 hours.

2. Put the shortening in a glass baking dish, place the dish in the oven and preheat to 425 degrees.

3. Mix together the Bisquick, poultry seasoning, cayenne pepper, salt & pepper. Dredge the chicken in the Bisquick mixture.

4. Place the chicken skin side down in the melted shortening coated baking dish, spritz with cooking spray and bake for 30 minutes. Flip chicken, spritz with cooking spray and bake for another 30 minutes or until chicken juices run clear. Be sure to let the chicken rest for at least ten minutes so that the skin adheres to the meat.

*note: I didn't have any actual buttermilk at the time so I did the milk & lemon juice trick (1 tbsp lemon juice per cup of milk will give you buttermilk)

**second note: I live in Brooklyn and therefore everything takes forever to cook in my oven. If you have an oven that hasn't been around since the mid 70s, be sure to watch your chicken carefully.

***third note: lots of notes on this one, but a note about Bisquick. I happen to really like the slightly sweet, waffley taste that the Bisquick gives the chicken, but if this isn't your thing and you're more of a purest, feel free to substitute regular old flour.

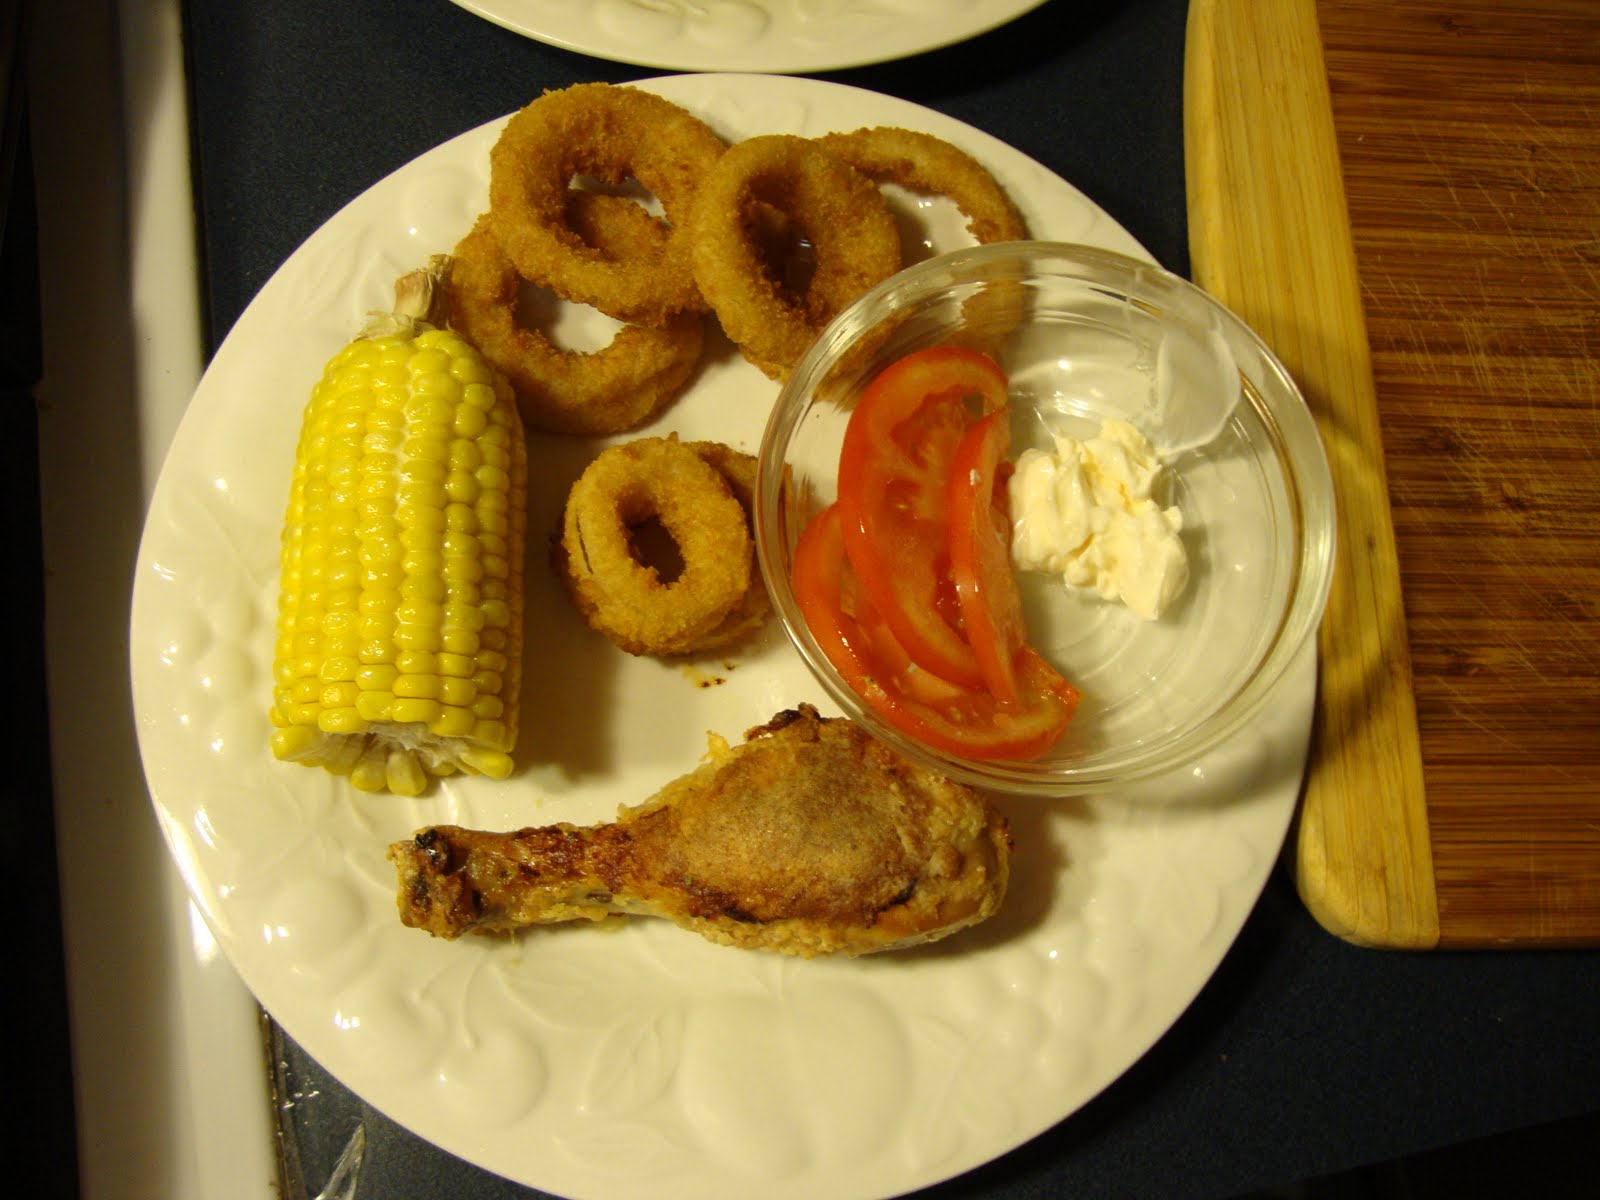
Hey look! An actual picture of the finished product:
Just um, don’t mind the terrible lighting in our kitchen…..or the huge mayo finger smear in the tomato bowl.

Monday, May 16, 2011

Bourbon Maple Braised Sausage & Pierogies

A few days ago I was really in a cooking mood.  It’s been a stressful few weeks and I was feeling really excited to get in the kitchen and whip up something delicious.  Only one hitch in the plan though….I was too lazy to go to the grocery store.  So instead, I decided to challenge myself to come up with something new and tasty by “shopping” in my kitchen.  Think of it as embracing the freegan lifestyle, but without the part that involves dumpster diving for expired hot dogs.

http://images.businessweek.com/story/08/600/1009_mz_freegan.jpg
photo via Bloomberg Business Week
At any rate, I scrounged around for a while and eventually found a package of chicken sausage and frozen pierogies. Score! I love pierogies and had completely forgotten about them….until now.  The resulting dinner was delicious and gave me warm, fuzzy memories of my Pittsburgh days (Hail to Pitt!).
Now I’m feeling really proud of myself for making a new recipe and saving money by using forgotten freezer food.  What do you say readers? Have you ever shopped in your own kitchen for dinner? How did it turn out?

Bourbon Maple Braised Sausage & Pierogies
1 12 oz package chicken and apple sausage, sliced
1 16 oz package pierogies
1 onion, sliced
1/4 cup bourbon
1 tbsp maple syrup
1 14.5 oz. can chicken broth
1 tbsp olive oil
  1. Cook pierogies according to package directions.
  2. Heat olive oil in a frying pan and saute sausage and onions in a frying pan until the onions soften and the sausage browns (about 2-3 minutes).
  3. Turn off heat and add the bourbon to the pan to deglaze. Turn on the heat and cook off the alcohol. Add the maple syrup and chicken broth to the pan and simmer until reduced by half (about 10 minutes).
  4. Add the pierogies to the pan and heat through.

Friday, April 29, 2011

Please Pardon my French and Help Kick Some Sweet Auto Immune Disease Ass!

If you've been reading my blog, it should come as no surprise that my cooking style is more meat & potatoes than escargot & foie gras. In fact, we are so into the recent comfort food trend that we are planning to serve some classic favorites during our wedding reception next year (because shoveling mini burgers into my mouth while wearing an expensive, white dress seems like a good idea). 

However, you might not know that I'm also pretty clueless when it comes to wedding planning and have been obsessively reading wedding blogs in a desperate attempt to figure out what the heck I'm doing before the big day. So when a popular wedding blog put out a call for comfort food recipes as part of the Dishing for Dana FUNdraiser, I was on it like white on rice (or more accurately like cheese on mac).

To back up for a second, Dana is the blogger behind the snark and sass of The Broke-Ass Bride, which she developed into the snark and sass of The Broke-Ass Media Inc., which officially makes her a pretty bad-ass businesswoman.  Unfortunately, Dana also suffers from a lame-ass auto immune disease that requires lots of expensive-ass surgeries, which resulted in an ass load of bills that are not covered by Broke-Ass Media's small business insurance policy. Which sucks ass and is a major buzz kill. This Broke-Ass Bride is a tough cookie though so a little setback wasn't enough to kick Dana's ass and send her crawling into hibernation with a pint of Chubby Hubby for a major league pity party. Oh, heck no! Instead, she has decided to fight the power with a sweet-ass FUNdraiser....and this is where you come in.

As part of the Dishing for Dana FUNdraiser, she is asking for donations in an effort to continue her treatment, pay for her 12th surgery and save her eyesight. In return for your donation, you will get access to an awesome database of comfort food recipes contributed by a variety of bloggers (including moi), some awesome perks AND Dana will donate a portion of the proceeds to the American Autoimmune Related Disease Association. To summarize, for a small (or large) donation Dana gets the help she needs, the AARDA gets some money to help fund auto immune disease research and you get heaps of new recipes along with some pretty great extras. Pretty cool, huh?

So get your rear over to Dishing for Dana, make a donation, and keep your eyes peeled for my recipe for Mom's Simple Mac-n-Cheese Casserole.....unless you are my Mom in which case you already have this recipe (hi Mom! sorry about all the bad language in this post). Mom status aside though, I sincerely hope you will make a donation to contribute to a worthy cause and see some recipes that were not posted by your darling daughter.

So what do you say readers, do you want to get some rockin' new recipes and help kick some auto immune disease ass?

Sunday, April 24, 2011

Katie's Home-style Chicken and Egg Noodles

Happy Easter!  I hope everyone had a nice, relaxing day. I know I’ve been enjoying a full day of gorging myself on Peeps and Honeybaked Ham. I’m also super excited that the weather has been a little more reasonable recently.  Feels like it's been a long haul this year and I’m definitely ready to start having picnics in the park and dust off the old grill. Or maybe I’m just excited that I can finally walk to the subway without freezing off my little rear?!
Before I get ahead of myself though, I realized today that I forgot to share this recipe for Home-style Chicken and Egg Noodles…..oops.  This hearty soup is super comfort food, which was a huge hit in our household and is now part of the regular dinner rotation.  Seriously, run don’t walk to your kitchen and make it immediately, I promise you won’t be sorry!
Katie’s Home-style Chicken and Egg Noodles
2 skinless, bone-in chicken breasts
4 skinless, bone-in chicken thighs
2 14.5 oz. cans low fat chicken broth
43.5 oz water (3 chicken broth cans full)
1 chopped onion
2 chopped carrots
1 tsp nutmeg
1 tsp poultry seasoning
1 tbsp garlic powder
1 10.75 oz can cream of mushroom soup
8 oz home-style egg noodles
Salt & pepper to taste
  1. Place first 9 ingredients (through garlic powder) in a dutch oven on the stove.  Bring to a boil and simmer for 30 minutes.
  2. Carefully remove the chicken from the pot and pull meat from the bones.  Put the pulled chicken back in the pot and stir in the cream of mushroom soup. Add salt and pepper to taste.
  3. Add the egg noodles and cook according to package directions.
Just in case you didn't fully enjoy today's balmy weather, a little flashback below via Gothamist.

Wednesday, April 20, 2011

Make-Ahead Meal Inspiration

As I mentioned in my last post, I’ve been stuck sitting around on the couch while recovering from a super fun appendectomy.  Unfortunately, this means I can’t carry anything heavy until Mid-May so regular grocery shopping is out for now. Luckily we have Freshdirect and a bunch of great friends and family that have stepped in to make sure we don’t starve (one friend even threw us a little grilled cheese party last week, awesome).
However, there’s no need to wait for someone to get sick to brighten their day with a delicious, homemade make-ahead meal. To inspire you, I've compiled links to some of my favorite make-ahead meals from the around the web for your cooking pleasure.  Just be sure to include the finishing instructions so that your friends can enjoy a delicious and easy meal!
Casseroles:  to make any casserole into a make-ahead meal, just prepare in advance, place in a disposable casserole dish, label and freeze.  When ready to use, thaw in fridge, and finish according to the recipe direction. Most casseroles can be prepared from frozen as well, just cover with foil, increase the baking time slightly and cook until heated through.

Freezer Friendly Individual Meals: to make ahead, prepare through assembly, freeze individually on cookie sheets and place in freezer bags.  When you’re ready to cook either thaw the portions you need in the fridge and cook according to the recipe or cook from frozen by increasing the baking time a little until heated through and golden brown.


Other Ideas: there are tons of other recipes that can adapted into a made ahead meal, here are a few ideas to get you started!

Crockpot Turkey Cheddar Meatballs – freeze individually and reheat in microwave when ready to eat
Crockpot Taco Soup – freeze in containers and reheat in microwave when ready to eat
Martha Stewart Quick Ravioli – freeze individually and reheat in boiling water when ready to eat
Rachael Ray Veal Ragu – prepare sauce and freeze until ready to serve over pasta

*Like this post? Have something to add? Want me to hear your two cents but don't have a google account? Just type your comment at the bottom of this post, select anonymous from the dropdown menu and click the post comment button.

Sunday, April 17, 2011

Grandma's Pickled Beets

It's almost Easter, yay for Easter! Seriously, who doesn't love a holiday that involves plundering a basket full of candy for breakfast?! Delicious. 

Anywho, in my family, as with many Pennsylvania families, this is the only time of year that we get to break out the pickled beets.  I have fond memories of my Grandmother pulling a giant glass container from her fridge before Easter dinner which was filled full of beets, eggs and pickle juice. Now before you start picturing regular pickle brine with a bunch of beets and eggs thrown in (which would be gross), I have to tell you that the brine for this one more closely resembles a sweet & sour spiced syrup. Admittedly that's still a bit weird, but for some reason it just works.

Also, I have no idea how this pickled beet tradition began or why it is such a quintessentially Easter thing but I don't care because pickled beets are delicious.  One small note though, I'm not a big fan of hardboiled eggs so now I make mine sans offending eggs. If you're into that sort of thing though, feel free to throw a few peeled, hardboiled eggs into the brine to make some red beet eggs. I promise I won't judge.

Grandma’s Pickled Beets
  • 2 15 oz cans of sliced beets
  • 1 ½ c. sugar
  • ¼ c. apple cider vinegar
  • 2 cinnamon sticks
  1. Drain beets, reserving liquid in a small saucepan
  2. Add sugar, vinegar and cinnamon to the reserved liquid
  3. Heat to a rolling boil, stirring constantly.
  4. Pour over beets, let cool and then refrigerate for at least 8 hours.


image via Photo Bucket

Wednesday, April 13, 2011

Manly Man Irish Coffee

I've been sick, sickie, sick, sick....as in appendicitis sick. I had absolutely no idea, I thought I had the flu, but I guess that's why I don't have a medical degree.  My poor fiance, Mr. Awesome, took me to the doctor on Thursday and we thought I'd end up home in twenty minutes with instructions for lots of rest and fluids. WRONG. Instead the doctor took one look at me and sent us off to the ER for IV fluids and a CT Scan of my appendix. Two days, two sleepless nights, many scared tears and lots of blood tests later, I was free to go home minus one appendix.

Throughout the whole ordeal Mr. Awesome was there to hold my hand while I got an IV and intimidate the nurses into attending to my every need. He was there to keep me entertained with Angry Birds in the ER, go on a midnight toiletry run, bring me ice chips and manage my crankiness.  However, nothing touched me more than seeing my tough man with a little touch of sand in his eye when I woke up from anesthesia because he was so relieved to see me awake and okay. Now I understand why people get married, it's nice to have a right hand man to look out for you when you can't do it for yourself.

Poor guy though, he's had a rough week.  After a few days of sleeping in an uncomfortable hospital chair, he was definitely ready for some coffee and a lot of nerve calming booze. A word of caution though, this drink is no shrinking violet, but it's also a great treat for the stressed out guy in your life!
 
Manly Man Irish Coffee
1 mug brewed coffee
1 part Godiva chocolate liquor
2 parts Bailey’s Irish Cream
3 parts Jameson Irish Whiskey

1. Mix all ingredients together and enjoy!

*1 part is about equal to 1/2 jigger which means this is not for the weak of heart.

**To make a girlier version, just add milk or cream to taste and pretend you are enjoying an apres ski drink by a roaring fire.
Provided via youtube.com

Sunday, April 3, 2011

BBQ Chicken Joes

The man of the household worked a double shift last weekend, which meant we spent a rare Saturday together. So, we made a little mini vacation out of it by meeting a friend for brunch, drinking boozy milkshakes in the afternoon and watching a Back to the Future marathon. In a word, our day together was AWESOME!
I knew that Mr. Man would be pretty tired from working an 18 hour shift, so I rewarded him with slowcooked BBQ Chicken Joes for dinner.  He had his on country white bread as a sandwich, which he swears is the way to go, but I had mine straight up in a bowl which I think is the better option.  Now I'm back from my "vacation" and trying to avoid the huge mountain of laundry that's been piling up in the bedroom, sigh.....

BBQ Chicken Joes
1 lb ground chicken
1 red bell pepper, chopped
1 onion, chopped
2 tbsp vinegar
2 tbsp Dijon mustard
¼ c. BBQ sauce (I used Stubb’s honey pecan sauce)
1 tbsp sugar
1 tsp chili powder
Shredded cheese as garnish
1.       Combine all ingredients in crockpot, cook on low for 8 hours.
Enjoy with the '80s movie of your choice for a fantastic date night!

image via Abduzeedo